ceramic
This is a little more detailed write-up because I used this system as part of the pen plotter postcard exchange (#ptpx), and I think it was a fun progression. Obligatory disclaimer that I know there’s a lot I don’t know yet about tilings!
The Pattern
I like how it can create isometric patterns but creates some patterns because it has only two tiles: a rhombus and a trapezoid. The pattern also didn’t fit neatly into the repeated tiling system I’d been working on, so I wanted to see how it could work.
The system progressively builds each row, tracking whether the last tile leaned to the left or right. It then randomly chooses between the corresponding trapezoid or rhombus. That sets the next starting angle, and it repeats this until it’s close to the end. Close to the end, we have to take over from complete random choices because I wanted it to end with the correct slope.
Tiling patterns
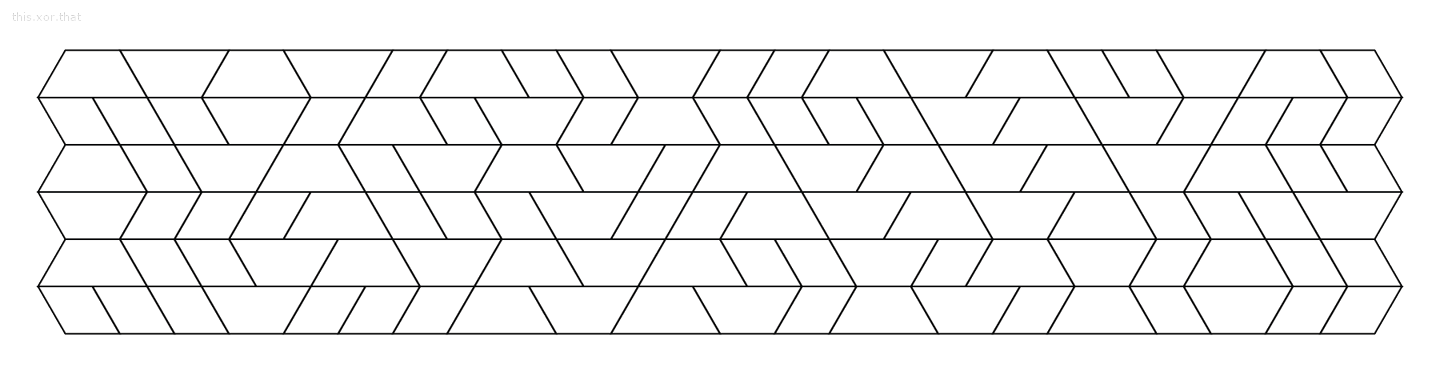
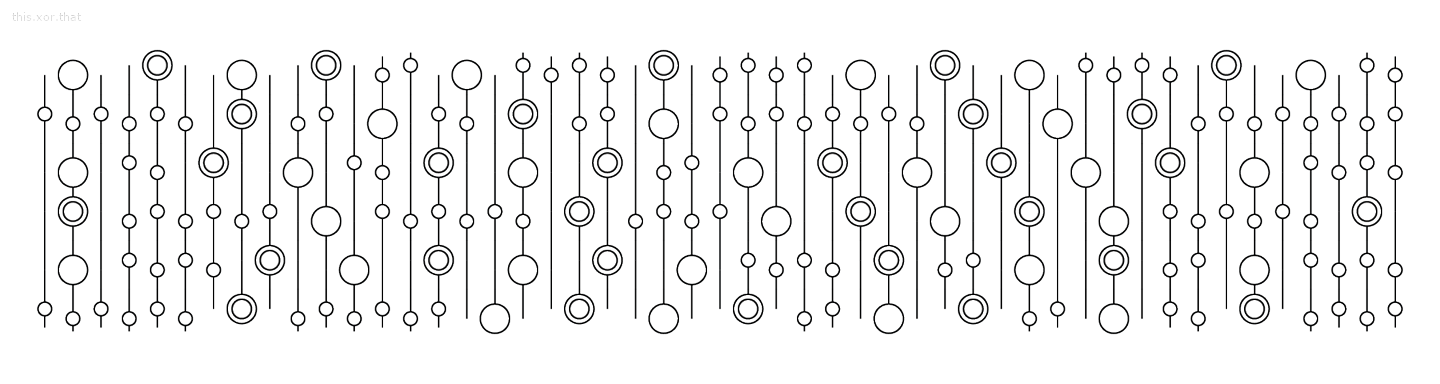
I’d heard about Girih Tiles, where tiles have more intricate patterns and the tile’s borders are hidden. I started to explore some patterns I could use. So for example this one

which when repeated gives us something like this
I set some points on the tile that will align with adjacent tiles. This ended up with 6 locations on the trapezoids and 4 locations on the rhombuses.
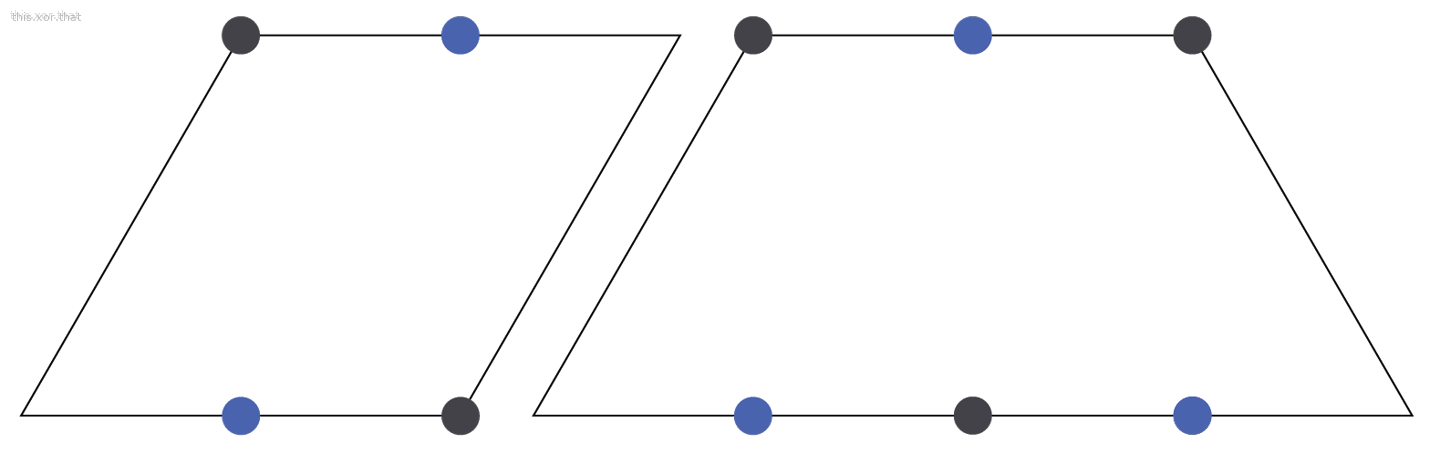
As long as the design draws something on these points, they’ll all be connected nicely. You can also decide only to use the faces, only the corners, or none at all.
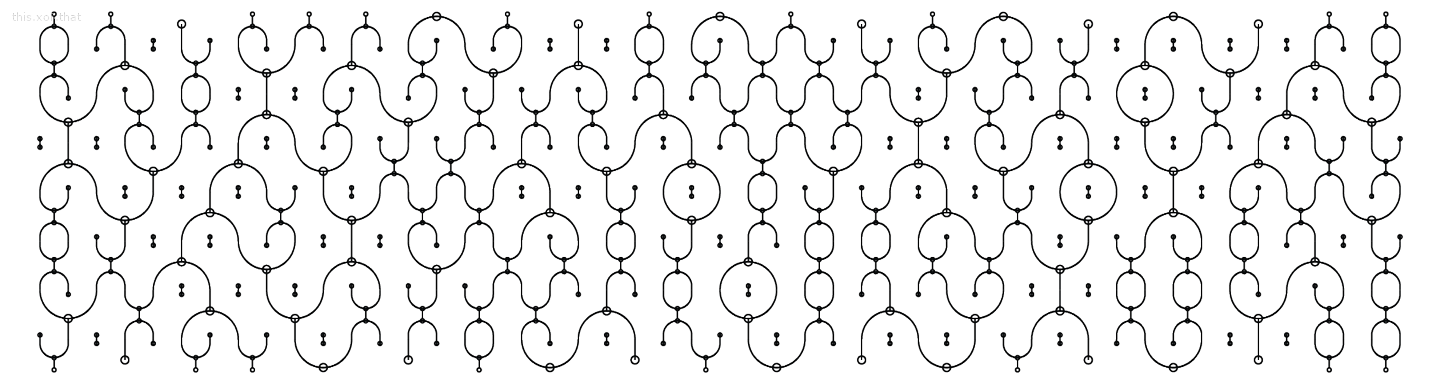
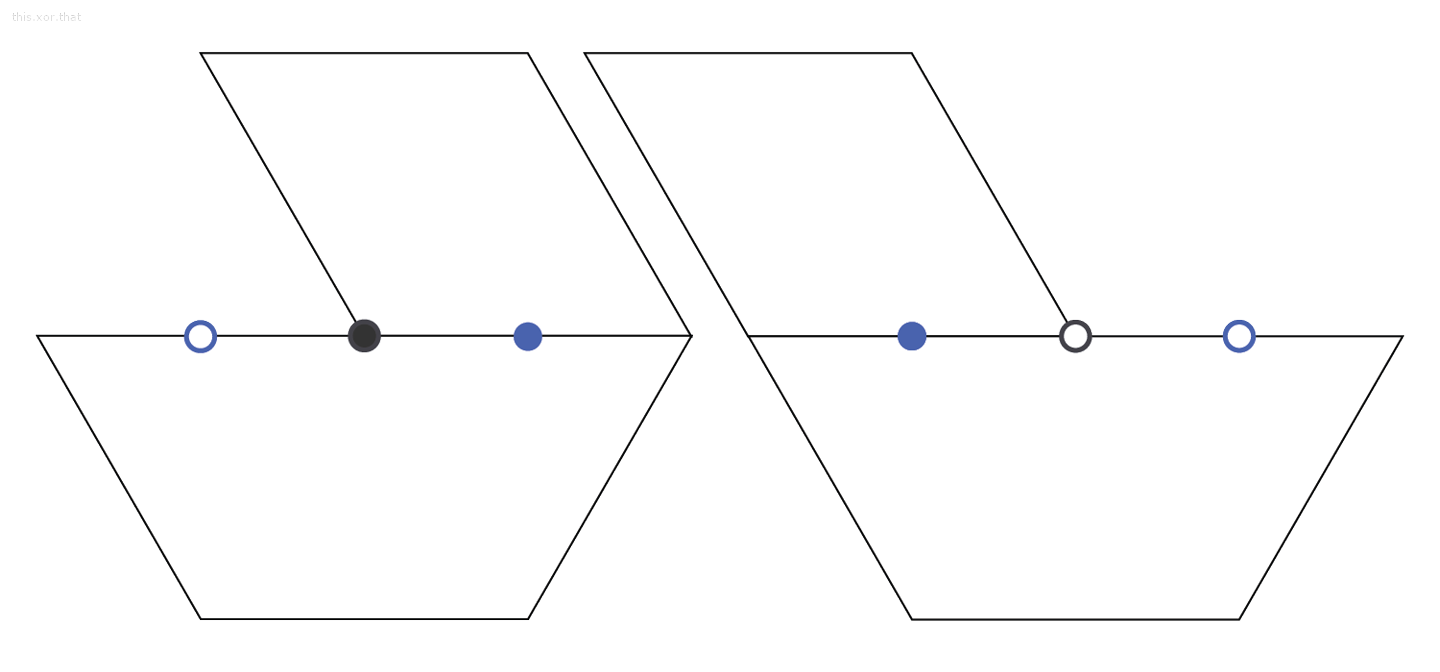
Edges
You might have noticed the edges in the pattern above look different. This is because I can configure lines to be drawn differently if an adjacent face or corner is missing. For example, this turns straight horizontal lines of tiles into a more satisfying variation.
Here’s a tileset without context-dependent edges:

And here’s a tileset with context-dependent edges:
For faces, I just need to check if the neighbor exists. The corners get more tricky. The design only works if it has at least one neighbor that leans over the corner. So the gray center dot is active in the tiles to the left but is inactive in the tiles to the right.
Going through the effort of implementing this also lets me hide arbitrary tiles instead of sticking with a rectangle shape.
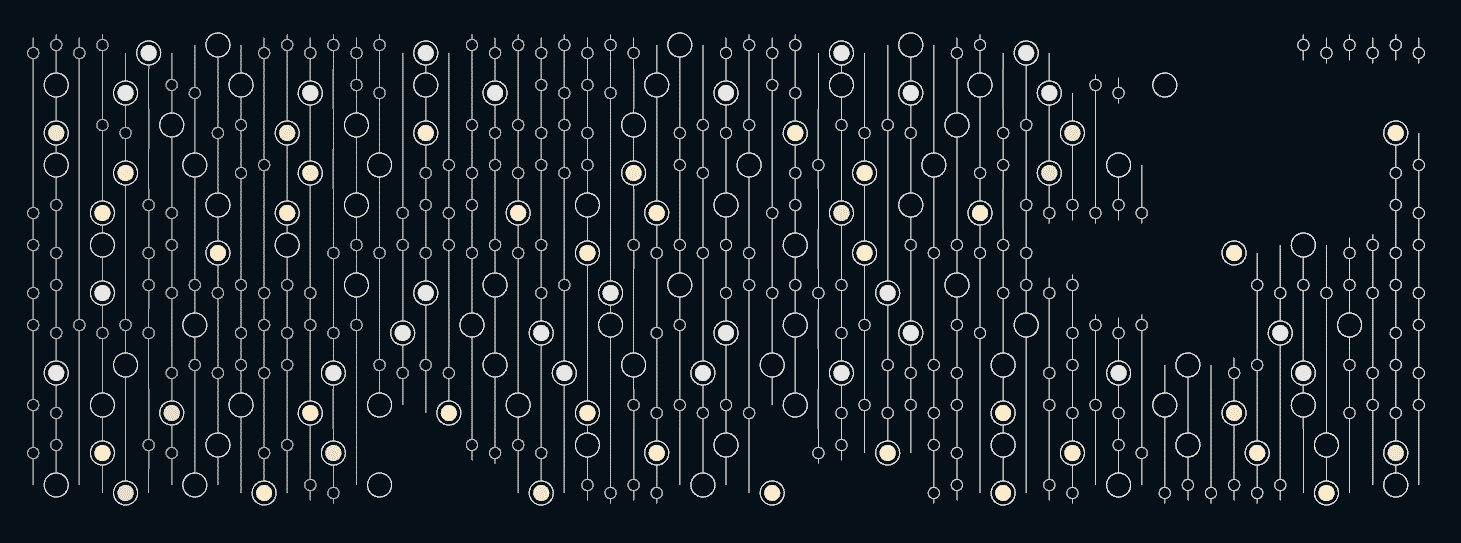
Octaves
I’d read this paper on multi-scale Truchet Patterns and decided to do the same for these tiles. The way I did it was to make it so each tile can be recursively split up into tiles that have half the height. In the code, I call these octaves since they’re about twice the frequency, like in music.

Because of how it’s implemented, the higher octaves do have more rhombuses.
This makes the edge checks even trickier because it needs to tell what octave adjacent tiles are in. It’s mostly implemented at this point, though some of the tiny octaves don’t realize they’re neighbors. I considered that okay because it is mostly connected, it wasn’t producing a cut-off line, and it was midnight before leaving for the holidays and I wanted to get them plotted.
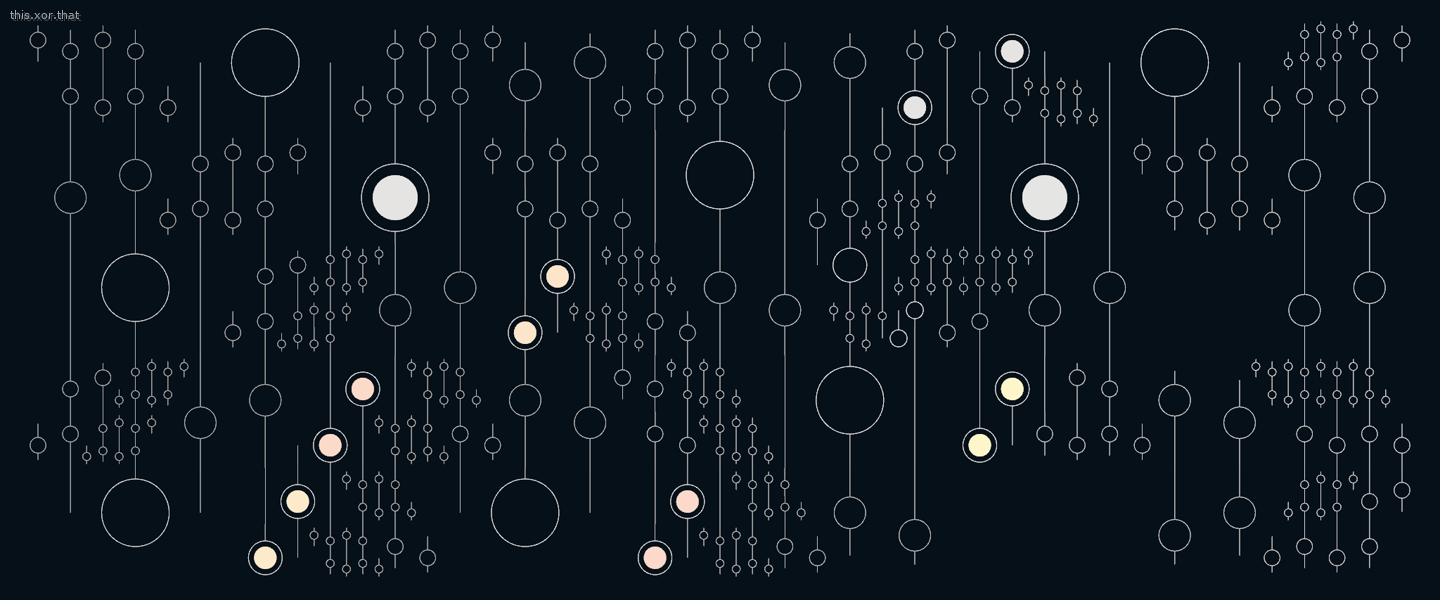
Postcards
That’s what I had implemented when I created the pen plotter postcards! I used a second color to highlight a few of the tiles that underlie the system. And now that you’ve checked out this page, you know what I mean by that!

I’ll probably keep adding a few more things to this page as I implement them. It’s a really fun system to work with.